git config --global user.name "Your Name"
git config --global user.email user@eafit.edu.co2 Version control
Here we will first address what is version control, its importance and basics on the local workflow.
Later we will introduce GitHub and explore more advanced commands for the collaboration workflow
2.1 Version control systems
As its name suggests, a version control system (VCS) allow you to keep record of the changes happening while working files and directories. Several VCSs have been created but the most popular is git. It is characterized by being a distributed VCS, which means that changes history are recorded locally (whether in a user laptop or user account) in contrast to other centralized VCSs that changes are saved on a shared machine or server.
So, why bother to learn a VCS in bioinformatics? Well there are many reasons, but to highlight some of them: i) Since VCSs allow you to record changes, you can always trace back the steps made in ana analysis, which is nice for the reproducibility of your work. ii) a system like git could be coupled with a shared-centralized server as it is GitHub (we’ll talk about it later and then one could share and collaborate, expanding the extent of your research and iii) following the structures and command from git its at first overwhelming and demands consistency and order, then when scaling a project it will payoff this stepping curve of learning by keeping the efficiency of your work.
2.2 Git installation and configuration
Installation could proceed from the official page of git. If working from WSL it has the binaries preinstalled, so you can jump directly to the configuration. The second step is to configure your user name and an email. with the following lines:
You could always user the preferred e-mail. More configurations are available, for instance the preferred editor to work with and so on, you can explore by asking for help git config --help or git config --list.
2.2.1 The basics
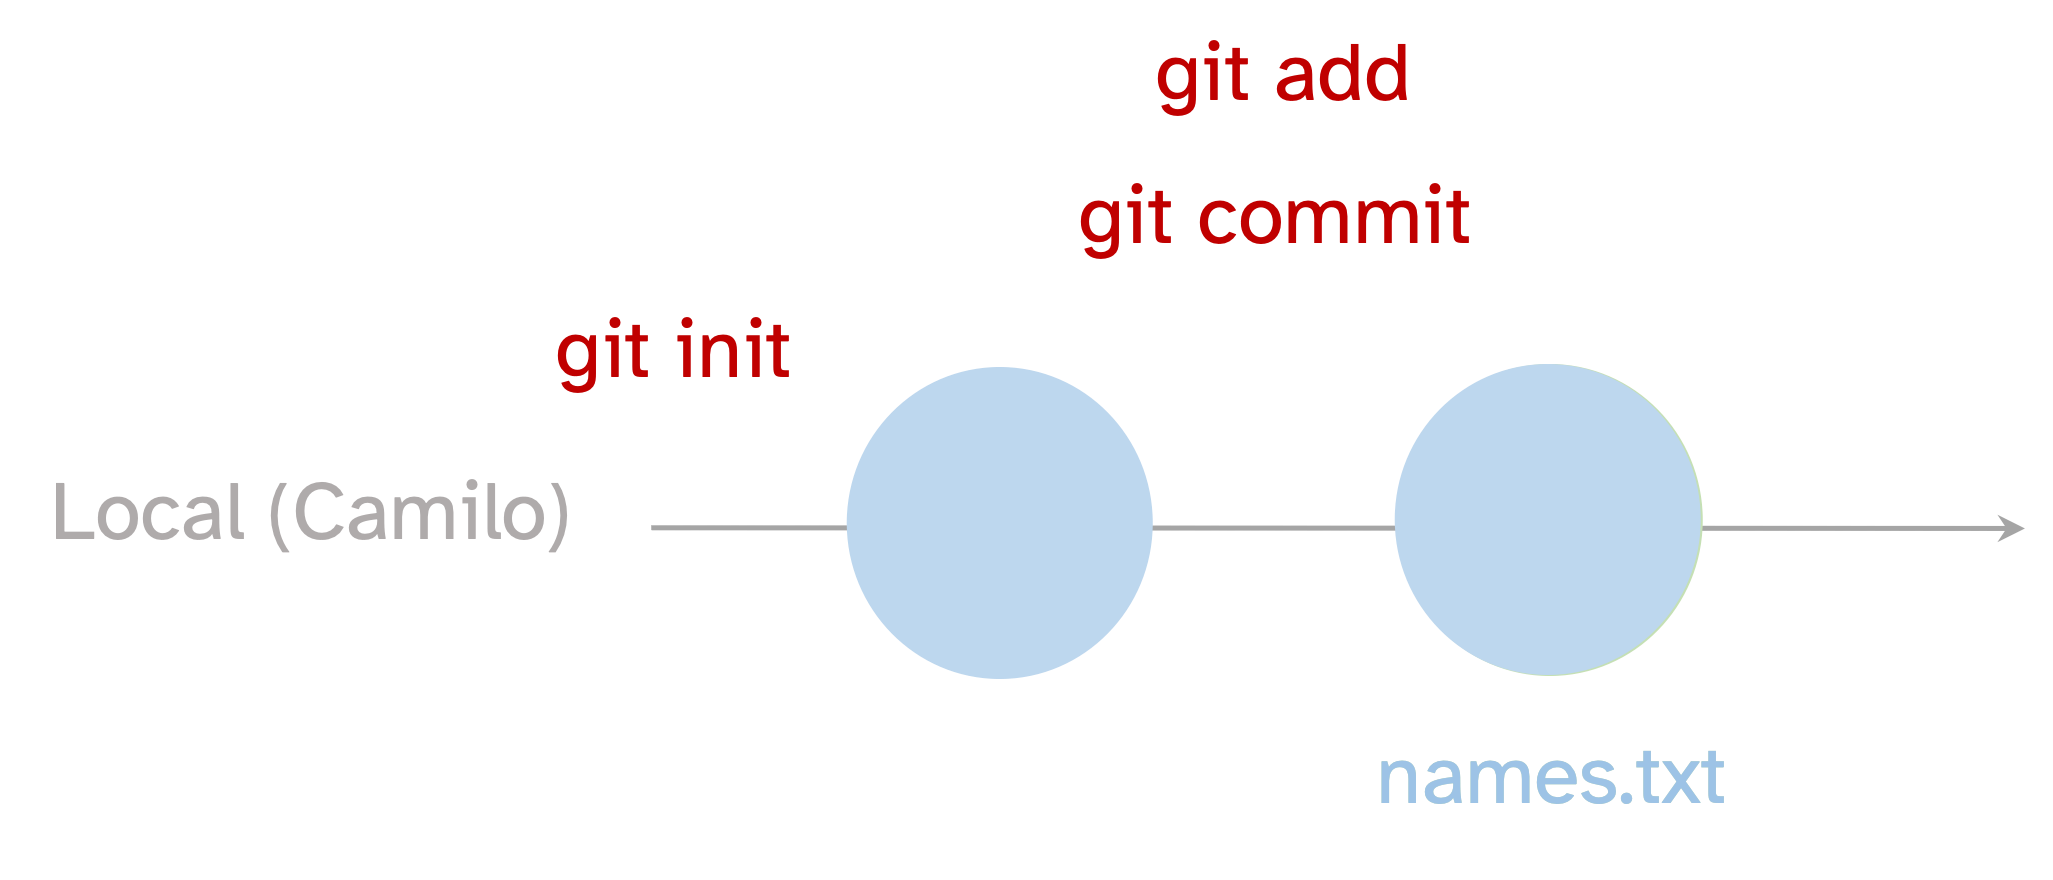
There are at least six basic commands. Three of them allow recording local changes (git init, git add and git commit) and the other three help you to inspect the state of the changes (git status, git diff and git log), we will dive into the detail in the following lines. So, to start recording changes in a directory you must initialize the directory (which will now be called repository) using git init. This is a one-time command to get started.
2.2.2 The local workflow
#local-workflow
2.3 Exploring GitHub
As mention before, one of the great advantages that git can later achieve is to collaborate. However, to get into that a sharable server must allow users to have a common ground, and this is what GitHub allow. GitHub is a web platform where the local repositories become public and any user can access to the controlled versions of an image of your repo. The famous pet is the octocat Fig. 2.1

To enable the communication with a remote repo, git has encoded many specific commands, once the repos are cloned a simple workflow from the own local and remote repos is made possible thanks to two simple commands git push and git pull.
There a several ways to starting out a remote project, whether it starts from a local folder or whether it starts from a remote repo. The second strategy is sometimes easier as you just need to later git clone the remote into a local folder. To do so every repo has its own code-icon to later copy the repo link and later hit git clone <https...> on the desired folder. Now you got a linked copy of the remote on your machine.
Caution
But before working on a remote and pushing your first commits, it is common to find an error regarding the remote branch (also called origin). There are several ways to avoid this caveat, but a very anticipated way is to configure git
git config --global push.autoSetupRemote trueThis will save you from every time typing git push --set-upstream origin <main> when working on a new remote repo.
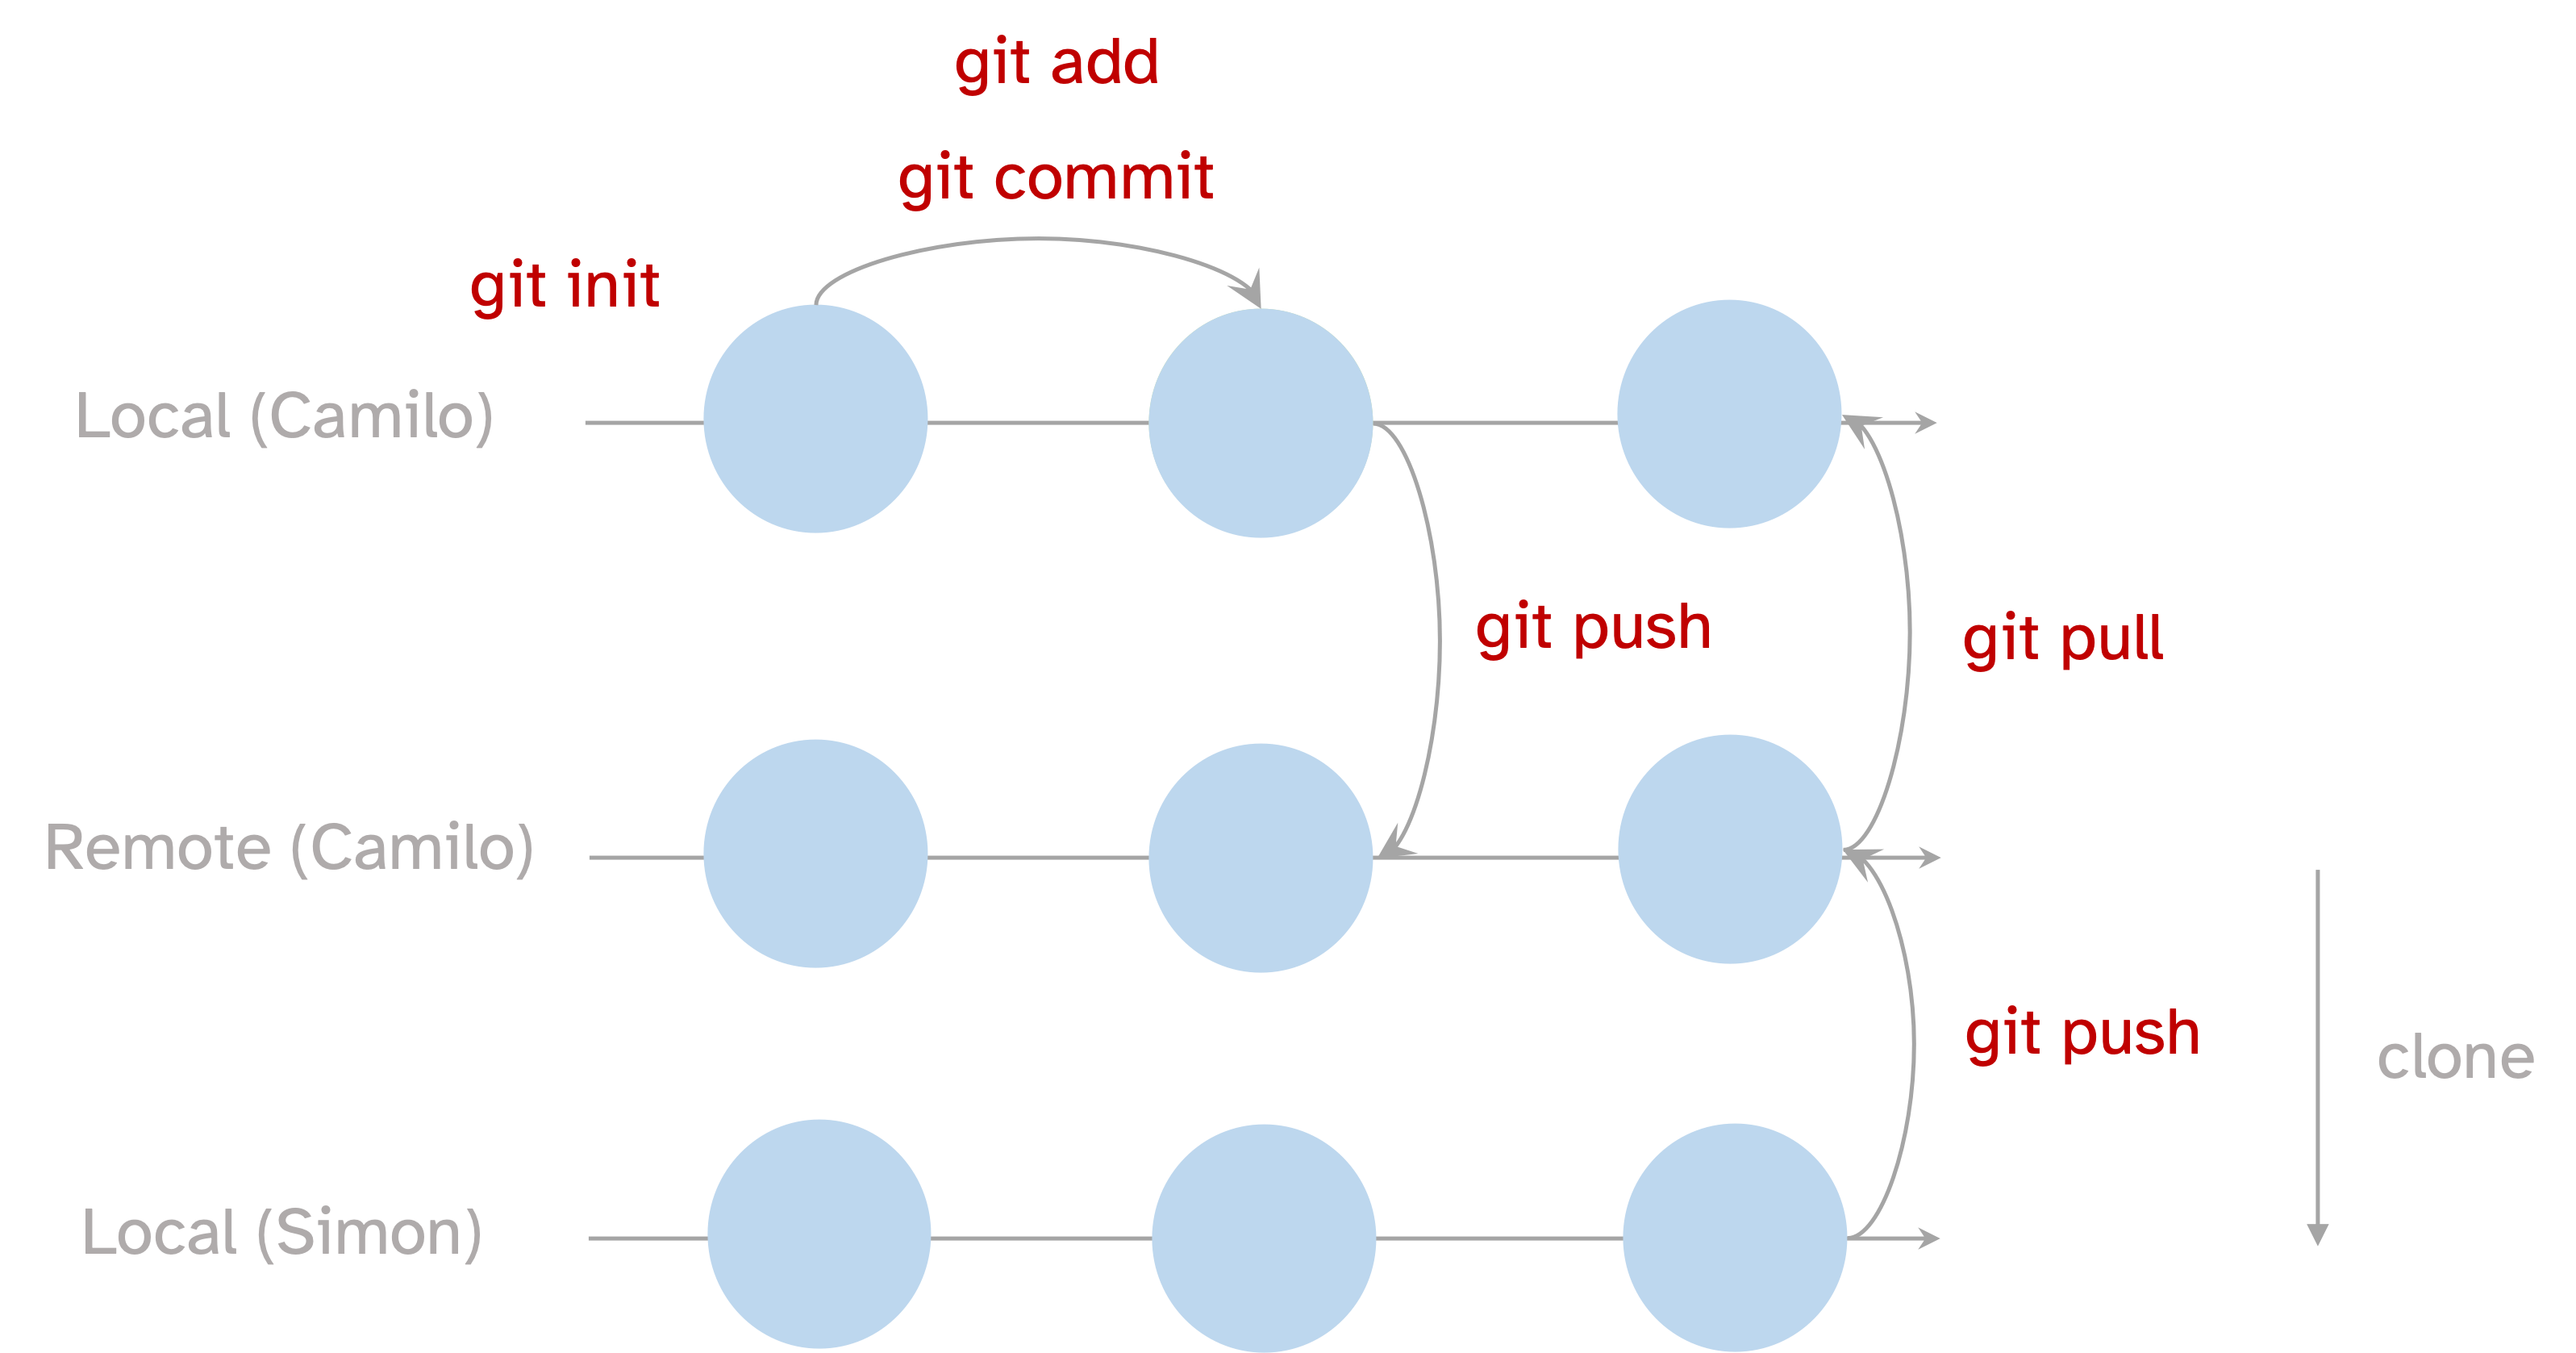
Cloning is therefore the process of creating a local copy of remote repository, that is a machine version of the remote repo, later all the common local workflow is carried out normally Fig. 2.2
Tip
If you want to keep a file out of synchronization git provides a simple way to do so by creating a .gitignore file having the the paths to the files to keep in your local machine
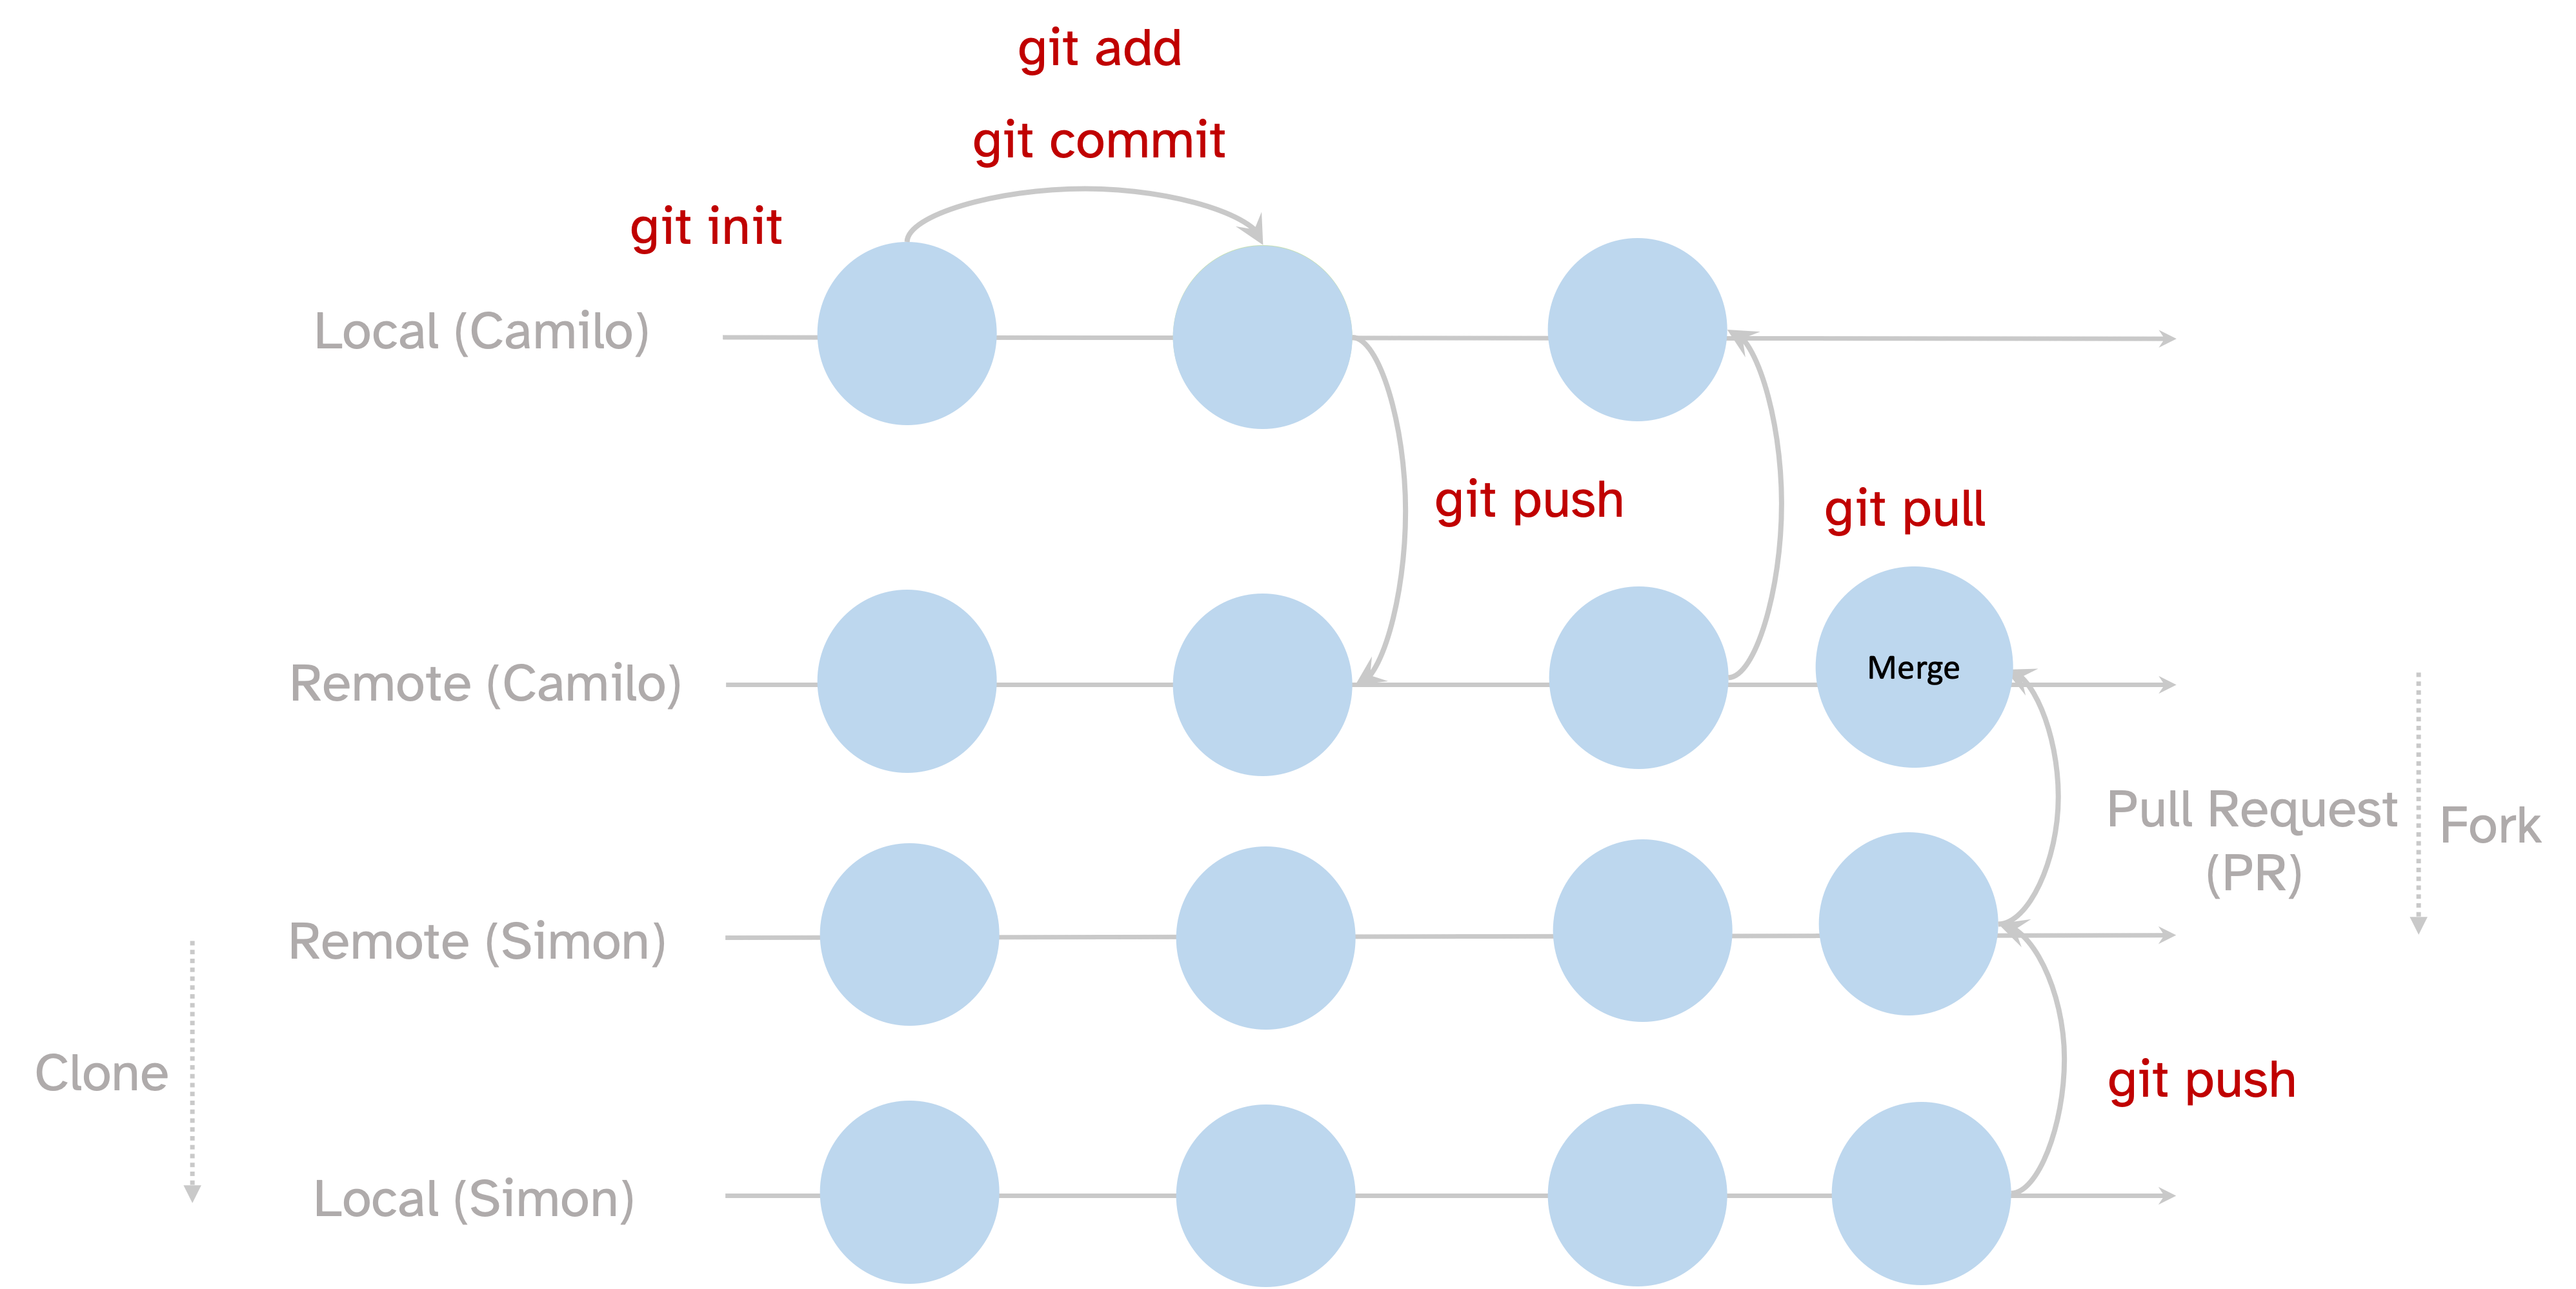
2.3.1 Forking and collaborate
Basic collaboration on an open repository is a three-step process. First you need to fork the repo, this will create a mirror copy of the repo in your GitHub profile. In a second step, a simple clone of the repo will generate a copy of the forked repo on your local machine, so you can freely work and make your mistakes and push them to your forked repo that belongs to your account. In a third step, once they are on the remote repo you will have to create a pull request (PR), as its name suggest: you are asking the owners of the original to consider your changes Fig. 2.3.